Coastal winds in the Northern San Francisco Bay Area aren’t just a seasonal annoyance. For buildings that face the brunt of steady gusts, those winds can wear away at walls over time. Residential houses may show signs like small chips or cracks, while commercial buildings often face larger-scale damage. Whether it’s a downtown storefront or a suburban townhome, the effects of wind can take a toll on exterior surfaces, especially around corners, edges, and exposed walls.rnrnIt is when summer fades and fall begins that wind damage tends to show its true colors. Loose stucco, cold drafts, and increased energy bills are a few things property owners begin to notice. Getting those surfaces repaired before the chill and moisture of winter set in prevents long-term issues that could lead to more expensive repairs down the line. The goal here is to strengthen the building envelope while there is still time to act.rn## Identifying Wind Damage on Exterior Walls rnThe first step to fixing wind damage is spotting it. Some of the warning signs are obvious. Others only show up when you know what to look for. Walk around your property, paying close attention to parts of the exterior that get the most wind exposure.rnrnCommon visual signs include:rnrn- Cracks along stucco walls, especially near corners or rooflinesrnrn- Chips or flaking on the surface where debris or strong gusts have hitrnrn- Exposed mesh or base layers beneath the surface finishrnrn- Gaps between materials where sealants have lifted or worn awayrnrnNot every symptom is something you can see. Pay attention to indoor changes as well. If certain rooms feel colder than they used to or you notice a draft near walls and windows, there could be exterior damage allowing air to pass through. Energy bills climbing without changes in usage may also signal hidden wall damage. After a storm, water spots or damp patches inside could be signs of cracking worsened by wind pressure.rnrnSeasonal inspections are a good habit, especially for commercial spaces. Rooftops, second-story walls, and tall façades are often overlooked but take on the full force of wind. If you operate a business where customer comfort or climate control matters, it is smart to address exterior wall issues before winter rolls around.rn## Tools and Materials Youâll Need for Stucco Repairs rnOnce you’ve identified damage, the next step is gathering the right materials to get the job done right. Stucco repair needs more than a quick patch job to be effective against future damage.rnrnBasic tools and materials required include:rnrn**- Trowels:** For applying and smoothing stuccornrn**- Hammers or chisels:** To chip away damaged stuccornrn**- Stucco mix:** Choose a type that matches your existing wall (such as one-coat or traditional three-coat)rnrn**- Bonding agent:** Helps the new stucco layer stick to the repair arearnrn**- Primer and sealant:** Used at the end for extra defensernrn**- Safety gear:** Gloves, eye protection, and a dust mask to work safelyrn- Cleaning supplies: Brushes, cloths, and mild agents to clean surfacesrnrnSome areas may also require mesh patching for better structural hold. Commercial walls, especially larger façades, may need scaffold access and extra personnel. Targeted planning and a fully stocked tool set will help ensure the repairs stand up to both weather and time.rnrnPrepping the surface properly is just as important as applying new stucco. Dirt, paint, or poorly bonded layers underneath can prevent new material from setting right. Making time for cleanup helps protect the final result and increases its durability once sealed and exposed again to daily weather.rn## Step-By-Step Stucco Repair Process For Wind Damage rnAfter youâve prepped your space and gathered your supplies, itâs time to start repairing. The order and care you put into the repair steps make a difference in how long the fix lastsâespecially on walls that are frequently hit by strong winds.rnrn1. Clean the damaged area by scraping away any loose debris and flaking stucco. Use a chisel or hammer gently until you reach a solid, steady base. If the underlying area is damp or soft, allow it to dry completely before going further.rnrn2. Apply a bonding agent next, making sure to coat the entire repair site evenly. Wait until the product becomes tacky, signaling that your wall is ready for fresh material.rnrn3. Then, apply the stucco mix in layers. For deep or large repairs, build up thin layers instead of applying one thick coat. Use your trowel to feather it out and mimic surrounding textures for a seamless finish.rnrn4. Allow the repair area to dry and cure properly. Depending on the weather, this could take a few days. After curing, apply a sealant to boost protection and moisture control. Once sealed, you can paint the area using products made specifically for stucco surfaces.rnrnLarger commercial projects may follow the same repair process but require more coordinated effort. Wider exposure areas, like building corners or upper floors, need careful sealing and extra smoothing to stop recurring cracks. A clean finish not only looks more polished but holds up better under physical stress.rn## Simple Ways To Minimize Wind Damage Going Forward rnOnce your repairs are wrapped up, a few simple routines can help your walls stand strong against future wind stress. Ongoing care reduces the chances of problems returning.rnrnHere are a few suggestions:rnrn- Set up seasonal inspections, particularly after large storms or high-wind conditions.rnrn- Focus on high-exposure parts of your property such as roofline corners and window borders.rnrn- Handle small repairs quickly instead of delaying until more damage appears.rnrn- Use weather-resistant coatings and ensure all exposed areas are sealed.rnrn- Watch for vegetation that rubs against building surfaces. Keep it trimmed to prevent damage.rnrn- Reassess any previously damaged area periodicallyâthese spots are often more vulnerable during future wind events.rnrnCommercial building managers can benefit from keeping detailed repair and inspection records. Create mile markers tied to weather cycles so that preventative maintenance becomes a habit, not a scramble. Larger structures have more exposure, so consistent protection is the better approach.rnrnHomeowners also play a role in long-term damage prevention. Even a routine cleaning and annual lookover can spot developing problems early. Maintaining paint and stucco integrity helps shield the surface underneath and keeps walls looking better for longer.rn## Protect Your Property From Future Damage rnStaying ahead of wind damage begins with knowing what to look for and using the right repair methods to fix it. Whether it is a small visible crack or a full stucco application across commercial property walls, taking action before winter hits can make a big difference.rnrnStucco is strong, but repeated stress from wind and moisture will eventually cause signs of wear. Tackling the problem areas early protects not only the look of your building but also the insulation and structure behind it. With solid repairs, followed by regular upkeep, your property is better equipped to handle whatever conditions come next.rnrnWind does not have to result in major repairs every season. With responsible maintenance and carefully executed fixes, the damage can be stopped before it spreadsâand you’re left with durable, reliable walls that are built to last.rnrnIf you’re noticing signs of wall damage or moisture intrusion, it’s worth exploring the long-term value of professional help with exterior stucco repairs. One Stop Plastering now also offers residential waterproofing services, giving property owners a reliable way to protect structures from future issues. For commercial contractors, working with just one team means fewer delays, a single point of contact, and a smoother process for managing all exterior waterproofing needs.
← Journal
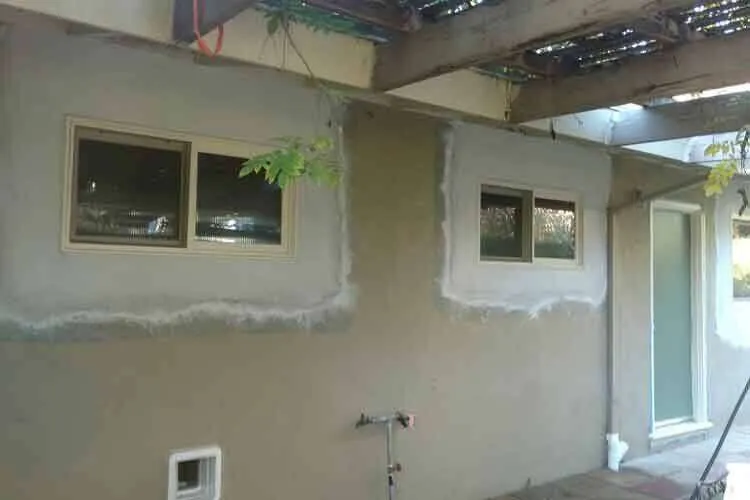
Repairing Wind-Damaged Exterior Wall Surfaces
Strengthen wind-damaged walls with professional exterior stucco repairs. Ensure long-lasting results with One Stop Plastering's expert services.